Instances
The Instances section in erm4sn allows administrators to configure and manage ServiceNow instances connected to erm4sn. This configuration ensures accurate data retrieval, schema analysis, and system synchronization.
Listing
- Click on the circle arrow icon to trigger a manual instance refresh.
- Click on an instance name to modify its configuration.
- Click Create New Instance to add a new ServiceNow instance to erm4sn.
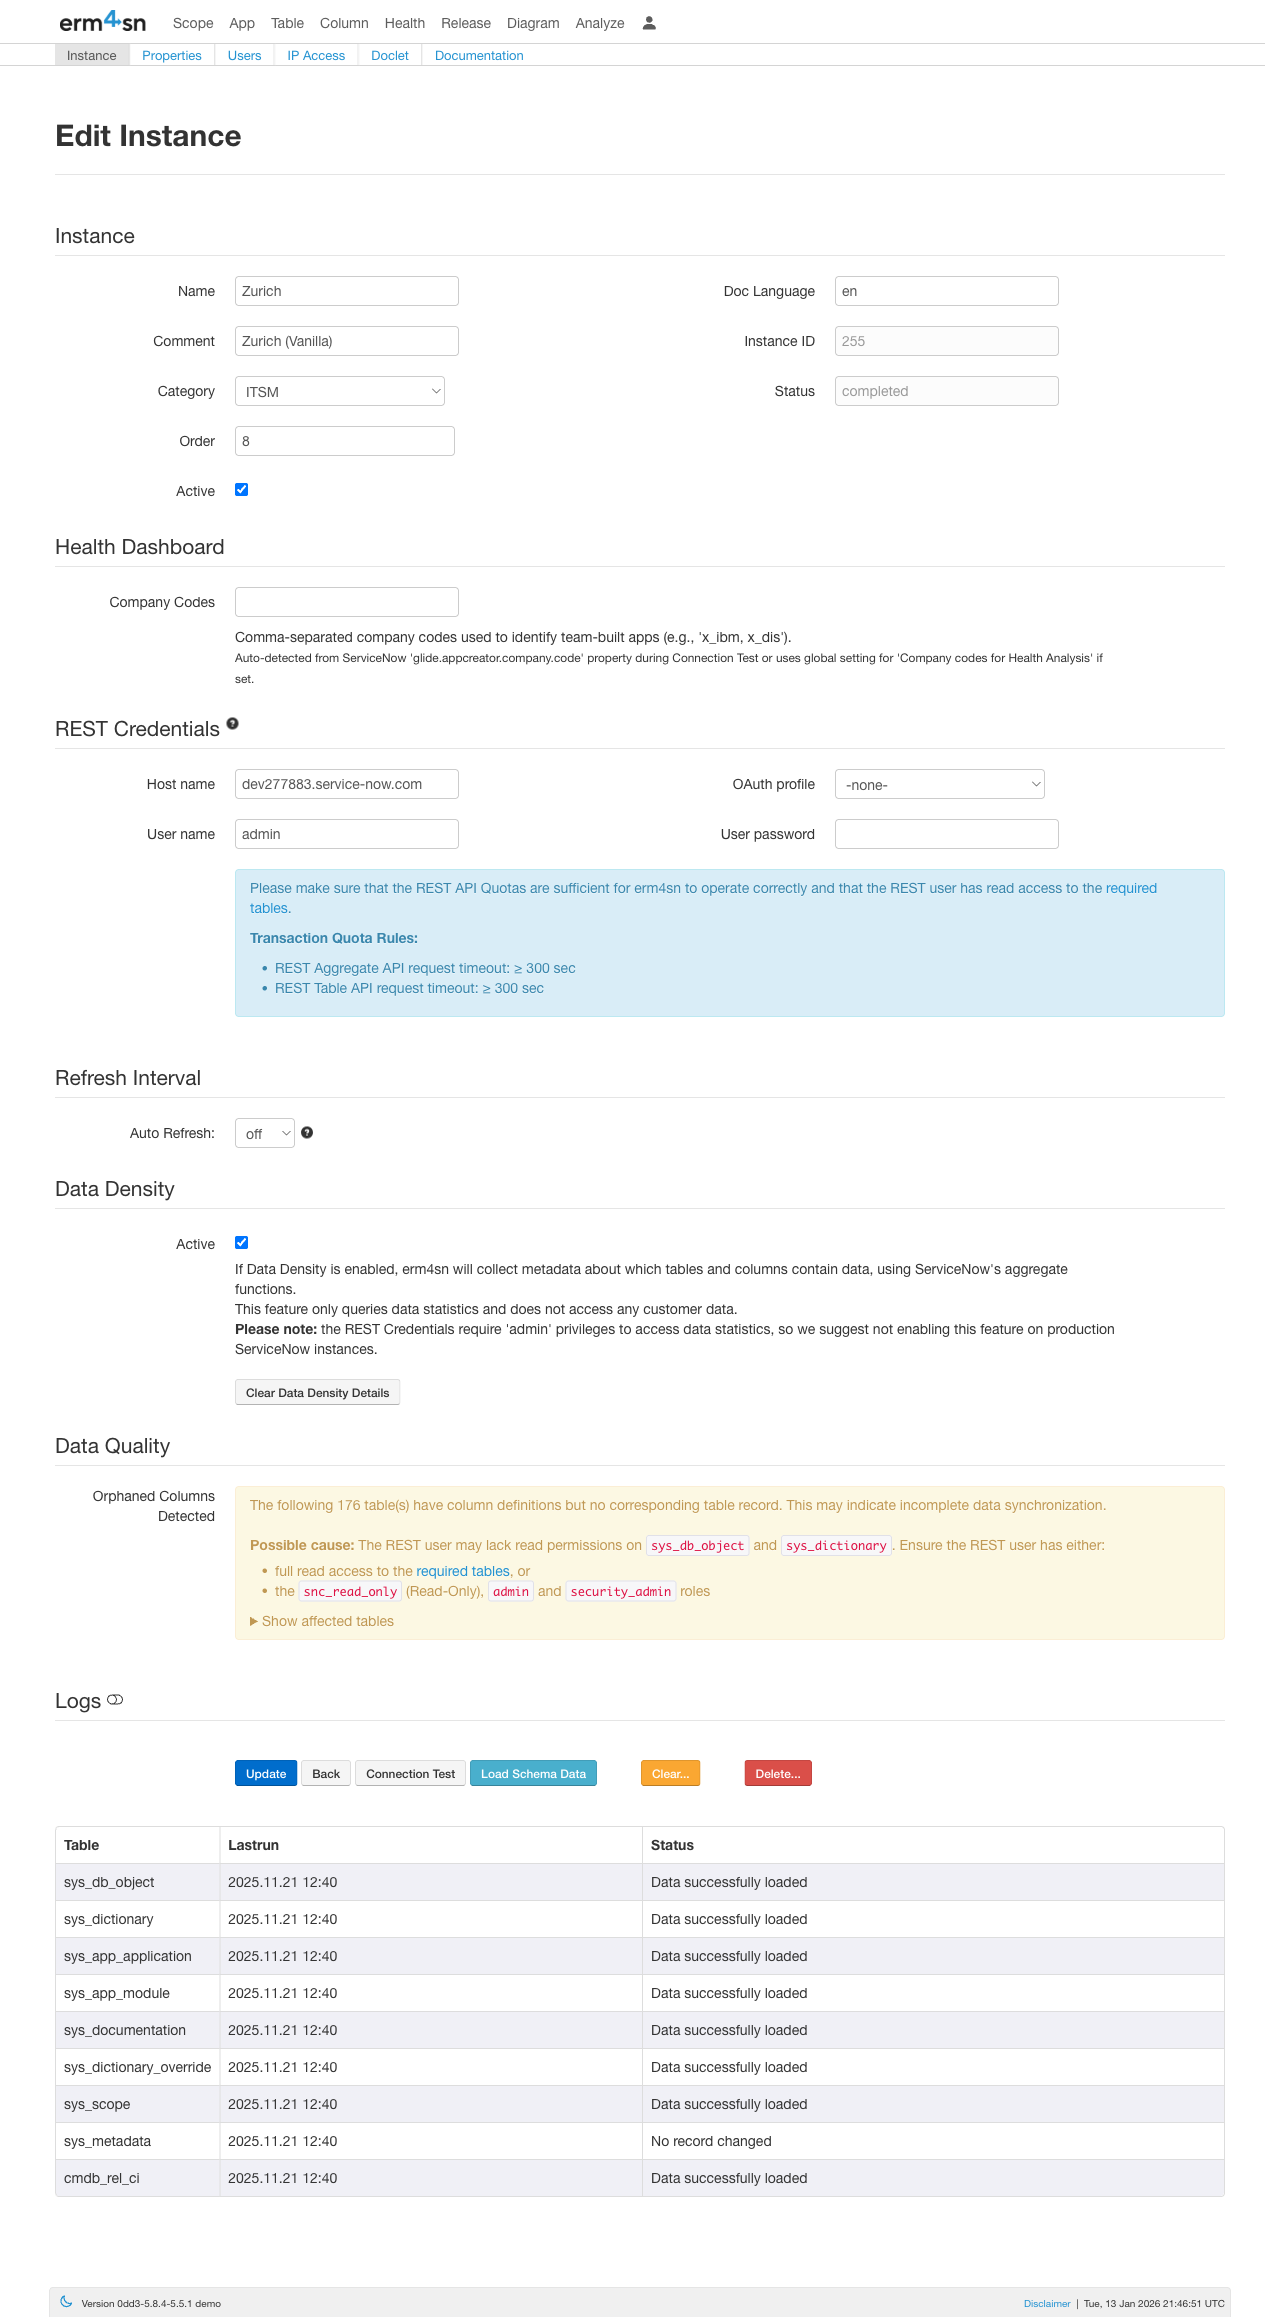
Instance Configuration
The Instance Configuration page allows you to define key properties for each connected ServiceNow instance.
General Settings
-
Enter the Instance Name
- Provide a descriptive name for the instance, such as
"Dev","Test", or"Prod".
- Provide a descriptive name for the instance, such as
-
Add a Comment (Optional)
- Enter additional information about the instance, such as its purpose or specific notes.
-
Set the Instance Category
- Define whether the instance is used for Development, Testing, Production etc.
-
Define the Display Order
- Specify a numeric value (e.g.,
1,2,3) to control the order of instances in the list.
- Specify a numeric value (e.g.,
-
View the Instance ID (Read-Only)
- Displays the internal system-generated ID of the instance.
-
Set the Documentation Language
- Define the short key for the labels' display language (e.g.,
"en"for English).
- Define the short key for the labels' display language (e.g.,
-
View the Status (Read-Only)
- Displays the current refresh status of the instance.
-
Enable or Disable the Instance
- Toggle Active to enable or disable data collection for this instance.
Health Dashboard
- Set Company Codes
- Enter comma-separated company codes used to identify team-built apps (e.g.,
x_, u_xx) or leave empty to let erm4sn auto detect it. - Any scoped application whose scope name starts with these prefixes will be classified as a custom app in the Health Dashboard.
- Custom apps are always considered "healthy" since they are maintained by your team.
- This is a key setting for the Health Analysis feature. For more details, see the Health Dashboard documentation.
- Enter comma-separated company codes used to identify team-built apps (e.g.,
Data Density
-
Enable or Disable Data Density Calculation
- Toggle Active to enable or disable this feature for the instance.
- When enabled, erm4sn collects metadata about which tables and columns contain data using ServiceNow’s aggregate functions.
-
Important Considerations:
- This feature only queries data statistics and does not access customer data.
- The REST API user must have admin privileges to retrieve data statistics.
- It is not recommended to enable this feature on production ServiceNow instances.
-
Clear Data Density Details
- Click Clear Data Density Details to remove all stored data density details for the instance.
The collected data density information is not refreshed automatically. To update the data density details, click the Clear Data Density Details button and then trigger a instance refresh.
Data Quality
- Orphaned Columns
- Displays a warning if erm4sn detects column definitions (
sys_dictionary) that have no corresponding table record (sys_db_object). - This may indicate incomplete data synchronization or that the REST user does not have access to certain tables.
- Displays a warning if erm4sn detects column definitions (
If you see a warning about orphaned columns, ensure the REST user has the admin and snc_read_only roles for complete table access.
REST Credentials
-
Enter the ServiceNow Host Name
- Provide the full ServiceNow instance URL, e.g.,
https://customer.service-now.com.
- Provide the full ServiceNow instance URL, e.g.,
-
Either Select the OAuth Profile
- Choose an OAuth profile from the preconfigured options in the OAuth settings.
-
Or Enter the REST API Credentials
- Username: The REST API user account.
- Password: The REST API password.
Make sure that the REST API Quotas are sufficient for erm4sn to operate correctly. Ensure the REST user has read access to the required tables.
Transaction Quota Rules:
- REST Aggregate API request timeout: ≥ 300 sec
- REST Table API request timeout: ≥ 300 sec
Refresh Interval
-
Enable or Disable Auto Refresh
- Toggle Auto Refresh to automatically update the instance at a scheduled time.
-
Set the Refresh Schedule:
- Hour: Define the hour of the day when the refresh should run.
- Day of Week: Select the specific weekday for the refresh (e.g.,
"Monday"). - Day of Month: Specify a particular day of the month if needed.
- Month: Choose the months when the refresh should occur.
Logs
- View the Instance Refresh Logs
- Toggle the Show Logs button to display logs from the most recent refresh.
Actions
-
Update Configuration
- Click Update to save the instance settings.
-
Return Without Saving
- Click Back to exit without making changes.
-
Test Connection
- Click Connection Test to verify that erm4sn can successfully connect to the ServiceNow instance.
-
Manually Load Schema Data
- Click Load Schema Data to retrieve the latest schema information immediately.
-
Clear Instance Data
- Click Clear... to remove all stored data for this instance in erm4sn.
-
Delete Instance Configuration
- Click Delete... to permanently remove the instance configuration and all associated data from erm4sn.
The accuracy and completeness of data displayed in erm4sn depend on the access level of the REST API User credentials.
For the best experience, we recommend using a user with the “admin” and “snc_read_only” roles.